Turn on Instant File Initialization for SQL Server Performance – With Video Demo
Without Instant File Initialization turned on, each time a data file on SQL Server 2005 and above is created or has to grow in size, the file or portion of the file added must be zeroed out. Depending on the size of the file this can be a very time consuming task.
By turning on Database Instant File Initialization, you are telling the operating system to trust SQL Server to properly handle this allocation. Since you are looking to enable Instant File Initialization you should also consider setting a proper auto growth setting for your database. Something in MB verses percentage. This should be a fail safe, you try to implement some type of policy or procedure to monitor the amount of free space in your databases and try to grow them after hours. What me demonstrate this on YouTube.
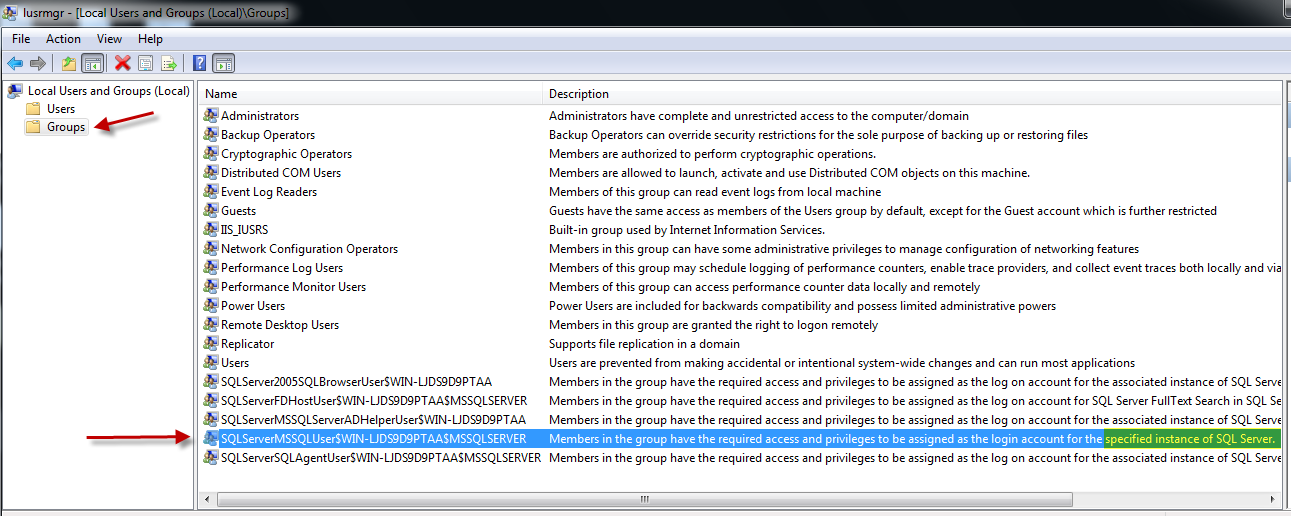
While there isn’t an option within SQL Server to turn this on, the process is very simple. You simply have to add a SQL Server group to a security policy. To find which group to add you need to run lusrmgr.msc on the workstation or server in question. Click on Groups, marked with a RED arrow on the top left of the image below. Then look for the group that states “specified instance of SQL Server” This is highlighted in the image below. The group in my experience has nearly always been “SQLServerMSSQLUser”, plus Machine Name, then Instance Name. Take note of this group (write it down) as you will need to add it to a local security policy. You can now close out of lusrmgr.
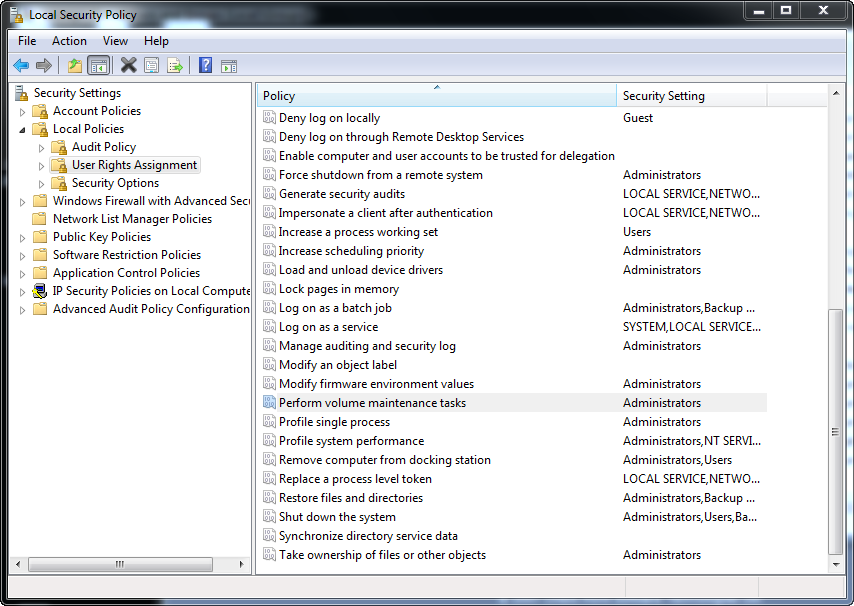
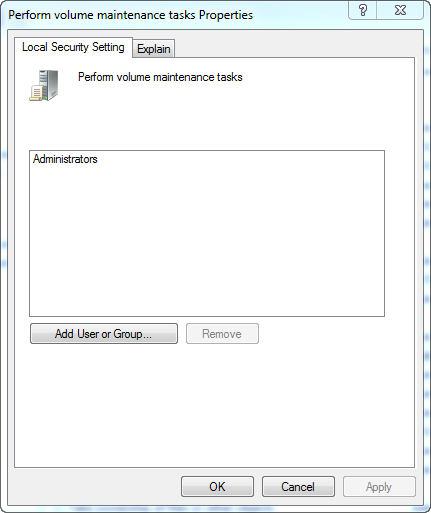
Next click start, run and type SECPOL.MSC. The dialog box in the image below will open up. Expand “Local Policies”, click on “User Rights Assignment”, then scroll down the list of Policies until you see “Perform volume maintenance tasks”. Double click on “Perform volume maintenance tasks”.
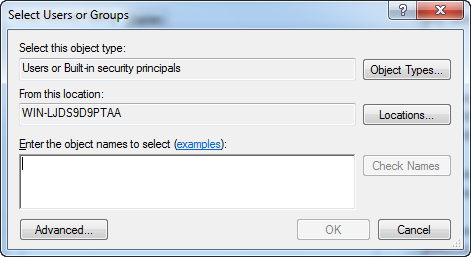
Click on “Add User or Group”
Click on “Object Types”
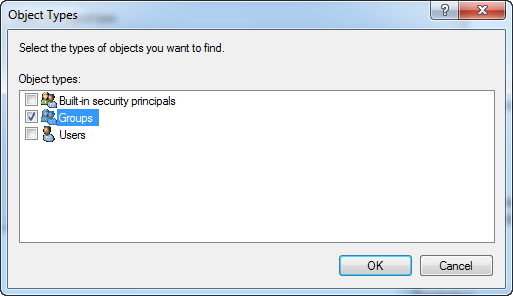
Uncheck all boxes except for “Groups” and click “OK”
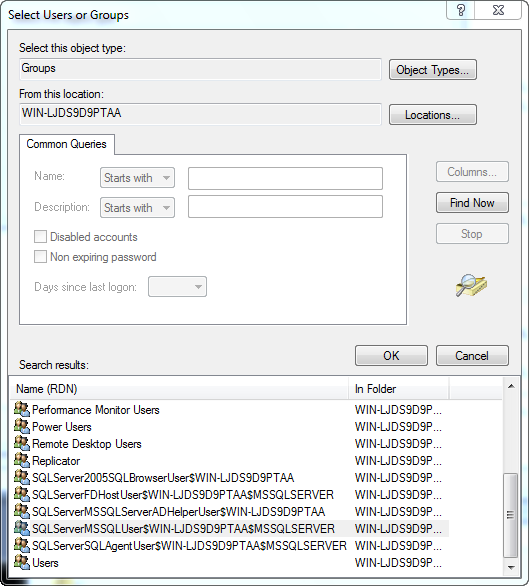
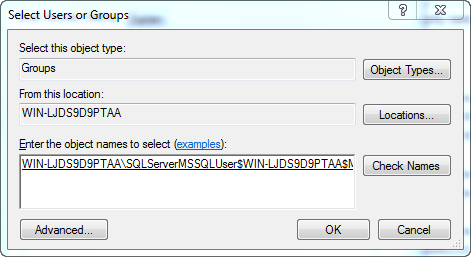
Next make sure that “Locations” is your local workstation or server name, not the Active Directory Domain. Next click “Advanced” and chose “Find Now”, a list of groups should now appear. This is where you will scroll down the list and find the group you determined from above (lusrmgr.msc). In my example it is “SQLServerMSSQLUser$WIN-LJDS9D9PTAA$MSSQLSERVER”. Once you have selected your group click “OK”
You should now see your group listed.
Click “OK” and then “OK” one last time. That is it. You can now close the Local Security Policy window. When your database grows or when you add additional files, you should no longer have the long waits of the system having to zero out the additional space. Want to see a live demo of this, check out my YouTube Channel
Additional things to note is
1) You could just grant access to the SQL Server Service account, however if this Service Account is ever changed you will have to go back and add the new account to the Security Policy. Which ever way works best for you. The important thing is to just have it on.
2) By not zeroing out the file there could possibly still be data that could be read. This is a very slight security risk and there are only a few scenarios where this could pose a risk. The average Joe could not access the data.
3) Instant File Initialization only works for your data files, it does not have any impact to your LOG files.
Want to see a live demo of this, check out my YouTube Channel
9 Comments
Great Post, thank you – I usually just make sure the Service account is admin on the server and that covers this grant, right? Or did I assume too much 🙂
Have a great day,
Hugo
The service account will cover it, but if you ever have to change the service account you have to remember to go back and add it to the “Perform Volume Maintenance Task” policy again. Adding the group solves that problem.
For those on SSC the link to the new video is here – http://www.youtube.com/watch?v=F080TPcGAkU
Hi Tim, I am currently turning on this feature on my servers. I have read that in order for this feature to take effect, it requires restarting the sql server service. Have you found this to be true? Thanks!
My experience and what I have read is NO that you do not have to restart in order for it to take affect, however you do in order to remove it.
I have created a Connect Item to make it easier to check if this option is enabled on your instance: https://connect.microsoft.com/SQLServer/feedback/details/809901
Thanx for the post really informative, but what if there is no “SQLServerMSSQLUser” group in lusrmgr.msc? What does it mean? And how to solve it?
You would add the account of the sql server service account.